
Most people searching for the Amazon Vine login already have an invitation — they just cannot find the door. There is no separate Vine account, no special password, and no standalone app to download. This guide shows reviewers and sellers exactly how to get in, what to do once they are inside, and how to fix it when something goes wrong.
Quick Answer: How To Log In To Amazon Vine
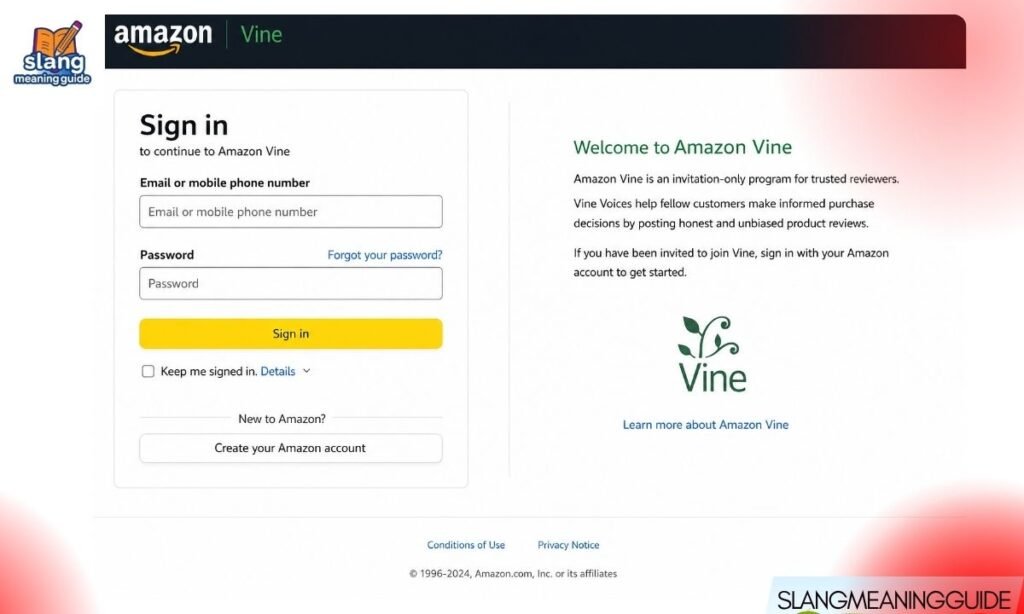
No separate account is needed. Amazon Vine uses your regular Amazon credentials. Here is the fastest path:
- Go to vine.amazon.com or amazon.com/vine
- Sign in with your existing Amazon email and password
- Complete two-step verification if prompted
- Your Vine dashboard opens automatically — if your account has an active invitation
If the dashboard does not appear after signing in, your account has not been invited yet.
What Is Amazon Vine?
Amazon Vine is an invite-only product review program that launched in 2007. Amazon selects trusted reviewers — called Vine Voices — and gives them free products in exchange for honest, detailed reviews.
Key facts:
- Vine reviews appear with a distinctive green Vine badge
- The program operates in 12 countries as of 2026, including the US, UK, Canada, Germany, France, Japan, and India
- Sellers use it to generate early reviews before a listing builds organic momentum
- Reviewers cannot be invited by sellers — Amazon’s internal system controls all invitations
Two Types of Vine Access
The login process depends entirely on who you are. There are two completely different entry points:
| User Type | Login Path | Cost |
| Reviewers (Vine Voices) | vine.amazon.com using Amazon credentials | Free (invite-only) |
| Sellers | Seller Central → Advertising → Vine | $0–$200 per ASIN |
Getting this wrong wastes time. Reviewers never go through Seller Central. Sellers never get reviewer dashboard access.
Reviewer Login: Step-by-Step
If you received a Vine invitation, here is exactly how to access your account:
- Go to amazon.com and sign in with your regular email and password
- Navigate to vine.amazon.com directly in your browser
- If the dashboard does not load, search “Amazon Vine” in Amazon’s search bar
- Click the Vine banner that appears at the top of the results
- Your dashboard opens with three main sections — available products, your Vine items, and reviews
Important notes:
- You must use the same Amazon account that received the invitation email
- Two-step verification may trigger — have your phone ready
- Bookmark vine.amazon.com after your first successful login
- The desktop browser gives the best experience — the mobile app UI is not optimized for Vine
The Vine Reviewer Dashboard
Once inside, the dashboard has three core areas. New Vine Voices often miss the third section entirely:
- Available for You — Products you can currently request, sorted by category
- Your Vine Items — Active shipments with review deadlines and tracking info
- Reviews — Where you write, edit, and submit your product feedback
Things to know about the dashboard:
- Review deadlines are real — missing them consistently reduces your access tier
- You cannot resell Vine products — Amazon prohibits this
- In some countries, free products received count as taxable income under local tax law
- Read the tax section in your dashboard before accepting high-value items
Vine Voice Membership Tiers
As of 2026, Amazon operates two reviewer tiers. Each tier affects how many products you can request per day:
- Standard tier — Basic daily request allowance
- Gold tier — Higher daily request limit, requires a 90% review completion rate
Amazon uses an internal algorithm to evaluate:
- Review quality and detail
- Balanced ratings (not just five-star reviews)
- Purchase history and account activity
- Amazon’s Review Insightfulness Score, introduced in mid-2025
There is no application. There is no way to request a tier upgrade. Amazon adjusts tiers automatically based on your performance.
Seller Login: How To Access Vine in Seller Central
Sellers do not go through vine.amazon.com. Their access path is completely different:
- Sign in at sellercentral.amazon.com
- Click the Menu icon in the top-left corner
- Go to Advertising → Vine
- The Vine dashboard appears if your account meets eligibility requirements
If you do not see the Vine option under Advertising:
- Your brand may not be registered in Amazon Brand Registry
- Your account may not be a Professional Selling Account
- The products you want to enroll may not qualify — check eligibility first
Seller Eligibility Requirements
Not every seller can use Vine. Before trying to enroll, confirm you meet all of these conditions:
- Professional Selling Account — Individual accounts cannot access Vine
- Amazon Brand Registry — Your brand must be enrolled and verified
- FBA only — Products must be fulfilled by Amazon, not merchant-fulfilled
- “New” condition — Vine does not accept used or refurbished items
- Under 30 existing reviews — Products with 30 or more reviews cannot be enrolled
- Images and description complete — Listing must be fully built out
- Not in a restricted category — Hazardous materials, adult goods, and certain categories are excluded
How To Enroll a Product in Amazon Vine
Once you confirm eligibility, enrollment takes about five minutes:
- From the Vine dashboard in Seller Central, click Get Reviews
- Paste your ASIN into the enrollment field
- Click Begin Enrollment
- Add up to 30 units to the enrollment
- Click Enroll and agree to the program terms
- The $200 fee is charged only after the first Vine review is published — not at enrollment
Expected results after enrollment:
- Reviews typically begin arriving within 4 to 8 weeks
- Most enrolled products receive 25 to 29 of 30 possible reviews
- Sellers cannot edit, remove, or respond to Vine reviews once published
- Vine reviews stay on the listing permanently regardless of rating
Vine Enrollment Fee Breakdown
The fee structure changed in recent years and causes confusion. Here is the current breakdown:
- 0 reviews received — $0 charged
- 1 to 2 reviews received — $75 fee
- 3 to 9 reviews received — $125 fee
- 10 or more reviews received — $200 fee (maximum)
The fee is per ASIN, not per review. You are charged once per enrolled product based on how many reviews are ultimately generated.
Country-Specific Vine URLs
Amazon Vine is not US-only. If you are outside the United States, use the URL matching your marketplace:
- United States — vine.amazon.com
- United Kingdom — amazon.co.uk/vine
- Canada — amazon.ca/vine
- Australia — amazon.com.au/vine
- Germany — amazon.de/vine
- France — amazon.fr/vine
- Italy — amazon.it/vine
- Spain — amazon.es/vine
- Japan — amazon.co.jp/vine
Using the wrong country URL will redirect you or show an error. Always match the URL to the marketplace where your account lives.
Mobile App: What Works and What Does Not
Many users try to access Vine through the Amazon shopping app first. Here is what to expect:
- Reviewers can technically access Vine on mobile, but the interface is not built for it
- Writing detailed reviews is much harder on mobile — the text editor is compressed
- Browsing available products works on mobile but the layout is cramped
- Sellers should not use Seller Central’s mobile app for Vine enrollment — use a desktop browser
Best practice for mobile users:
- Open Chrome on your phone
- Tap the three-dot menu and select Request Desktop Site
- Navigate to vine.amazon.com
- The desktop layout loads in your mobile browser and works significantly better
Troubleshooting Common Login Problems
Most login issues fall into one of these categories:
“I can’t find the Vine link”
- Search “Amazon Vine” in the Amazon search bar
- Click the green Vine banner at the top of results
“The Vine dashboard doesn’t appear after login”
- Your account has not been invited — there is no workaround for this
“I get redirected or see an error page”
- Confirm you are signed into the correct Amazon account (the one that received the invitation)
- Clear your browser cache and try again
- Try an incognito window to rule out extension conflicts
“The ¶ button is missing from my Seller Central menu”
- Confirm your account is a Professional account
- Confirm your brand is enrolled in Brand Registry
- Check if your region supports Vine — not all marketplaces have it
“My Vine tier dropped unexpectedly”
- Review your completion rate — Gold tier requires 90%
- Check for missed review deadlines in the Your Vine Items tab
How To Get Invited to Amazon Vine as a Reviewer
This is the most searched question — and the answer is the one people least want to hear. There is no application.
Amazon’s algorithm selects Vine Voices entirely on its own. The selection factors include:
- Consistent history of detailed, helpful reviews
- Balanced ratings — not all five-star feedback
- Account activity and purchase history
- Amazon’s internal Review Insightfulness Score (active since mid-2025)
What you cannot do:
- Apply directly through any form or link
- Pay to join
- Ask Amazon to review your account for eligibility
- Get invited through a seller or brand
The only path is writing better, more helpful reviews and waiting. Invitations arrive by email when Amazon’s system identifies your account as eligible.
Frequently Asked Questions
What is the direct Amazon Vine login URL?
Go to vine.amazon.com and sign in with your regular Amazon email and password — no separate account is needed.
Do I need a separate Amazon account for Vine?
No — Amazon Vine uses your existing Amazon credentials; only the invitation determines whether your account can access the dashboard.
How do sellers enroll products in Amazon Vine?
Sign in to Seller Central, go to Advertising → Vine, paste your ASIN, add up to 30 units, and click Enroll — the $200 fee applies only after the first review is published.
How do I get invited to Amazon Vine as a reviewer?
Invitations are 100% controlled by Amazon’s internal algorithm — there is no application, no fee, and no way to request one.
Why does Amazon Vine not show up in my Seller Central account?
Your account likely needs a Professional Selling Account, Brand Registry enrollment, or your products may not meet Vine’s FBA and listing requirements.
Conclusion
Amazon Vine login is straightforward once you know which door to use — vine.amazon.com for reviewers and Seller Central for sellers. No separate account, no special password, and no shortcut to an invitation. Use the troubleshooting steps when something does not load, bookmark the URL after your first successful login, and always use a desktop browser for the best experience.

")


